Hangzhou Rubber Group, Wanxiang: "No layoffs, no pay cuts"
First, power on the instrument. Before starting, remove the desiccant from the sample compartment and ensure the power supply is properly connected. Turn on the power switch and wait for the system to complete its self-test. During this time, do not open the sample chamber.
Second, use the instrument. Once the self-test is completed (indicated by "OK" in all seven items), the main menu will appear. The screen displays seven options: 1. Photometric measurement; 2. Spectral measurement; 3. Quantitative measurement; 4. Kinetic measurement; 5. Data processing; 6. Multi-wavelength measurement; 7. System settings. After 30 minutes of thermal stabilization, the instrument is ready for normal measurements.
1. Photometric Measurement (T% or A at a given wavelength): Select [Photometry] from the main menu and press [ENTER]. Use the [GOTO WL] key to set the desired wavelength using the number keys, then press [ENTER]. Wait for the instrument to move to the selected wavelength. Press [F1] to choose between transmittance (T%) or absorbance (A). Open the sample chamber cover, place the blank solution in position R and the sample in position S1, then close the cover. Press [F3] to move the cuvette to the blank solution. Press [AUTO ZERO] to zero the instrument. Then press [F2] to move to the sample, and [F4] to measure T% or A.
After the measurement, you can print the data by pressing [START/STOP], or return to the main menu by pressing [MODE].
2. Spectral Measurement: Choose [Spectral Measurement] from the main menu. Set the sweep range, speed, sampling interval, and other parameters as needed. Place the blank solution in position R and the sample in S1, then close the cover. Press [F3] to move to the blank, [F1] to perform baseline correction, and [F2] to move to the sample. Press [START/STOP] to begin scanning. After the scan, press [F4] to print the spectrum, [F2] to detect peaks and valleys, [F3] to save the spectrum with a custom file name, or [F1] to adjust the coordinates. Press [MODE] to return to the previous menu.
3. Quantitative Measurement: Choose [Quantification] from the main menu. Set the wavelength, unit, and method. For the K-factor method, input the k and b values. For single-point calibration, measure a standard sample and set the working curve. For multi-point calibration, measure multiple standards, generate the calibration curve, and use it to determine unknown concentrations.
6. Multi-Wavelength Measurement: Select [Multiwavelength Measurement] and set the number of wavelengths and samples. Enter the desired wavelengths, place the blank and samples in the appropriate positions, and press [START/STOP] to begin the measurement. Afterward, press [F4] to print the results or [MODE] to return to the main menu.
Third, shut down the instrument. Invert the cuvette and rinse it thoroughly with distilled water or an organic solvent. Dry it upside down. Turn off the power, replace the desiccant, cover the sample chamber, and make a log entry. Obtain approval from your instructor before leaving.
Precautions:
1. Remove the desiccant before startup. Do not open the sample chamber during the self-test.
2. Fill the cuvette to about 2/3 to 4/5 of its height. Avoid overfilling to prevent spills. Keep the cuvette clean, wipe any droplets with lens paper, and avoid touching the light path. Use quartz cuvettes for UV measurements.
3. Never place reagents or liquids on the instrument’s surface. If there's a spill, clean it immediately.
4. After the experiment, empty the cuvette, rinse it, dry it upside down, turn off the power, and return the desiccant. Cover the instrument and get permission to leave.
Troubleshooting:
1. If the instrument fails to initialize, restart it. If the issue persists, report it to your instructor.
2. If the absorption value is incorrect, check the wavelength setting, ensure the instrument is zeroed, verify the correct cuvette is used (especially for UV), and confirm the sample preparation is accurate.
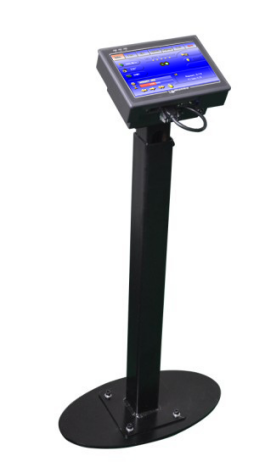
All the Electronic Jacquard Controller under this classification are applicable to all series of electronic jacquard machines..SJC9 Series controllers have several features include private data storage is easy to be preserved, strong anti-interference ability of industrial dedicated single chip, tiny body with options of installation and simple and easy for use.

Electronic Jacquard Controller, Jacquard loom Controller,Jacquard Machine Controller,Electronic Jacquard Control Panel
JIANGSU S&S INTELLIGENT SCIENCE AND TECHNOLOGY CO., LTD , https://www.ssjacquard.com